I get calls every week from homeowners who are watching their energy bills climb and can't figure out why. Nine times out of ten, the answer is sitting right outside their house — a heat pump caked in dirt, grass clippings, and cottonwood fuzz. Dirty heat pump coils are one of the most common and most overlooked reasons your system struggles to keep up, and the fix is often simpler than you'd think.
As an HVAC technician here at FlameTech Plumbing & Heating, I've cleaned thousands of heat pump coils across Calgary, Airdrie, and the surrounding communities. We work on heat pumps in Airdrie and throughout the Calgary region year-round, and I can tell you firsthand that a little coil maintenance goes a long way toward keeping your system efficient and reliable. In this guide, I'll walk you through exactly how to clean your heat pump coils safely, what tools you'll need, and when it's smarter to leave the job to a professional.
Why Dirty Heat Pump Coils Matter More Than You Think
Your heat pump relies on two sets of coils to move heat in and out of your home. The condenser coils sit inside the outdoor unit, and the evaporator coils are tucked inside the indoor air handler. Together, they handle the heat exchange that keeps your house warm in winter and cool in summer. When those coils get coated in dust, pollen, pet dander, or outdoor debris, they can't transfer heat efficiently. Your system has to work harder and run longer to reach the temperature you've set on your thermostat, and that extra strain shows up in a few predictable ways.
First, your energy bills start creeping up. Studies from the U.S. Department of Energy have shown that dirty condenser coils can increase compressor energy consumption by as much as 30 percent. That's a significant jump, and it adds up fast over a Calgary winter or summer.
Second, your comfort takes a hit. Rooms that used to stay consistently warm might develop cold spots. Your system might run constantly without ever reaching the set temperature. I see this all the time in homes where the heat pump hasn't been serviced in a couple of years.
Third, and this is the one that really gets people's attention, dirty coils shorten the life of your equipment. When the compressor is working overtime to compensate for poor heat transfer, components wear out faster. What should be a fifteen-to-twenty-year investment can turn into a ten-year headache if the coils aren't cleaned regularly.
Understanding Your Heat Pump's Two Coil Systems
Before you grab any tools, it helps to understand what you're working with. Heat pumps have two distinct coil systems, and each one has different cleaning requirements.
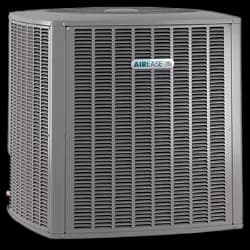
The outdoor condenser coils are the ones you can see when you look at your heat pump unit outside. They're wrapped around the perimeter of the unit behind a protective grille, and they're exposed to everything Alberta's weather can throw at them. Grass clippings from mowing, cottonwood fluff in June, fallen leaves in autumn, and road dust all collect on these coils over the course of a season. Here in Calgary, I also see a lot of construction dust on units in newer neighbourhoods where homes are still being built nearby.
The indoor evaporator coils are sealed inside the air handler cabinet, usually in your basement or utility room. They're less exposed to the elements, but they still collect dust, pet hair, and household particles that make it past your air filter. Because they're enclosed, they're also harder to access and more delicate to work around.
The outdoor coils are the ones most homeowners can safely clean on their own. The indoor coils are a different story, and I'll explain why a little further down.
What You'll Need to Clean Outdoor Heat Pump Coils
The good news is that you don't need specialty equipment for a basic outdoor coil cleaning. Here's what I recommend gathering before you start:
A garden hose with a standard spray nozzle is your main cleaning tool. You want enough pressure to rinse off accumulated grime but not so much that you damage the delicate aluminum fins. A regular garden hose on a moderate setting works perfectly. Do not use a pressure washer. I've seen homeowners flatten entire sections of coil fins with a pressure washer, and that kind of damage requires a service call to repair.
A soft-bristle brush helps loosen stubborn buildup before you rinse. I use a medium-sized utility brush with nylon bristles. An old dish brush works too, as long as the bristles aren't too stiff.
A commercially available coil cleaner is worth picking up if your coils are heavily soiled. These are non-acidic foaming cleaners specifically formulated for HVAC coils, and you can find them at most hardware stores. Follow the manufacturer's instructions on the label, as application times vary by product.
A fin comb is optional but handy if you notice bent fins during cleaning. Bent fins restrict airflow and reduce efficiency, and a fin comb lets you straighten them without causing further damage. You can pick one up at any home improvement store for a few dollars.
Work gloves and safety glasses round out the list. Coil cleaner chemicals can irritate skin and eyes, and the fins themselves are sharp enough to cut you if you're not careful.
Step-by-Step Guide to Cleaning Outdoor Condenser Coils
Here's the process I'd follow if I were cleaning my own unit at home, and it's the same approach our technicians use as the foundation for a professional cleaning.
Turn off the power first. This is non-negotiable. Look for the electrical disconnect box mounted on the exterior wall near your heat pump. It might be a pull-out disconnect or a standard breaker switch. If you can't find a dedicated disconnect, shut off the circuit at your main electrical panel. Once you've cut power, try turning the system on from your thermostat to confirm it's actually off before you proceed.
Clear the area around the unit. I recommend maintaining at least two feet of clearance on all sides of your outdoor heat pump at all times. Before you start cleaning, pull away any garden tools, patio furniture, or stored items. Trim back any shrubs, grass, or plants that have grown up against the unit. This is also a good time to rake out any leaves or debris that have collected underneath.
Remove loose debris from the unit. Brush off any visible leaves, twigs, cottonwood fuzz, or grass clippings from the top and sides of the unit by hand or with a soft brush. If you can see matted debris on the coil fins through the grille, gently brush it away working in the direction of the fins, not against them.
Rinse the coils with your garden hose. Spray the coils from the outside in, working from top to bottom. The goal is to flush dirt and debris out through the unit, not push it deeper into the fins. Use a steady, moderate stream rather than a hard blast. Work your way around the entire unit, paying extra attention to any sections that look particularly dirty.
Apply coil cleaner if needed. For units that haven't been cleaned in over a year or that have visible buildup even after rinsing, spray a foaming coil cleaner onto the coils according to the product's directions. Most foaming cleaners need five to ten minutes to penetrate and lift the grime. Don't let the cleaner dry on the coils, as it can leave a residue that actually attracts more dirt.
Rinse thoroughly one more time. After the cleaner has had time to work, rinse the entire unit again from top to bottom, outside to inside. Make sure all the cleaner residue is washed away.
Inspect the fins and straighten any damage. Once the coils are clean, take a close look at the aluminum fins. If you notice sections where the fins are bent or flattened, use your fin comb to gently realign them. Work carefully and don't force anything.
Let everything dry before restoring power. Give the unit at least thirty minutes to air dry before turning the power back on. This prevents any residual moisture from causing issues when the system starts up.
Restore power and test the system. Flip the disconnect or breaker back on, then set your thermostat to call for heating or cooling. Walk outside after a few minutes and confirm the outdoor fan is running and air is flowing freely through the coils.
What About the Indoor Evaporator Coils?
This is where I strongly recommend calling a professional rather than tackling the job yourself. The indoor evaporator coils are sealed inside the air handler, and accessing them requires removing panels, working around refrigerant lines, and navigating electrical connections. One wrong move can damage the coils, cause a refrigerant leak, or create an electrical hazard.
When our technicians clean evaporator coils during a maintenance visit, the process involves shutting down the system at the breaker, removing the access panel on the air handler, inspecting the coils for dust and debris buildup, using a soft brush or shop vacuum with a bristle attachment to remove surface grime, applying a no-rinse evaporator coil cleaner if needed, checking the condensate drain pan and drain line for clogs, and reassembling everything before testing the system.
There's also the warranty factor. If your heat pump is still under manufacturer warranty, certain DIY work on the indoor components can void that coverage. Professional maintenance keeps your warranty intact while ensuring the job is done correctly.
The best thing you can do for your indoor coils between professional cleanings is to change your air filter regularly. A clean filter is your evaporator coil's first line of defense. I recommend checking it monthly and replacing it every one to three months, depending on your household. Homes with pets, smokers, or allergy sufferers should lean toward the shorter end of that range.
How Often Should You Clean Your Heat Pump Coils?
For the outdoor unit, I recommend a thorough cleaning at least twice a year, ideally in late spring before cooling season and again in early fall before heating season kicks in. This schedule catches the worst of the seasonal debris and ensures your system is ready for peak demand.
That said, your specific situation might call for more frequent attention. If you live near construction, have a lot of cottonwood trees, mow close to the unit regularly, or live in an area with heavy pollen counts, you may need to rinse the outdoor coils every few weeks during the busy months. A quick five-minute rinse with the garden hose can make a noticeable difference.
For the indoor evaporator coils, professional cleaning once a year during a scheduled maintenance visit is usually sufficient. Combined with regular filter changes, this keeps the indoor coils performing well without the risks of DIY access.
Here in Calgary, I always tell homeowners that the best schedule is a professional tune-up in the spring and again in the fall. Alberta's climate puts unique demands on heat pump systems. We go from minus thirty Celsius winters to plus thirty summers, and that range pushes your equipment hard. Seasonal maintenance catches issues early and keeps your system running at peak efficiency when you need it most.
Signs Your Heat Pump Coils Need Immediate Attention
Between scheduled cleanings, keep an eye out for these warning signs that your coils may need attention sooner rather than later.
Rising energy bills without a change in usage are one of the clearest indicators. If your electricity costs have jumped noticeably and you haven't changed your thermostat habits or added new appliances, dirty coils are a likely culprit.
Reduced airflow from your vents is another red flag. When coils are clogged, the system can't move air effectively, and you'll feel the difference at your registers.
Uneven temperatures throughout your home often point to coil issues as well. If some rooms are comfortable while others are too warm or too cold, your system may be struggling to distribute conditioned air evenly because the coils are restricting performance.
Ice or frost forming on the outdoor unit during heating season is a serious sign that something is wrong. While heat pumps do go through regular defrost cycles in winter, persistent ice buildup can indicate that dirty coils are preventing adequate heat exchange. If you notice this, turn the system off and call a technician.
Strange noises coming from the outdoor unit, particularly rattling or buzzing, can sometimes be traced back to debris caught in the coil fins or around the fan. A quick visual inspection and cleaning may resolve it, but persistent noises warrant a professional diagnosis.
Common Mistakes I See Homeowners Make
After years of doing this work, I've seen the same mistakes come up again and again. Avoiding these will save you from turning a simple cleaning job into an expensive repair.
Using a pressure washer is the most common one. The high-pressure stream flattens the aluminum fins almost instantly, and those damaged fins restrict airflow just as much as dirt does. Stick to a regular garden hose every time.
Spraying the coils from the inside out pushes debris deeper into the fins instead of flushing it out. Always spray from outside the unit inward, letting the water carry the dirt through and out the other side.
Neglecting to turn off the power before cleaning is dangerous and can also damage the system. Moving fan blades, electrical contacts, and water don't mix well. Always disconnect power first.
Using harsh household cleaners like bleach, oven cleaner, or acidic solutions can corrode the aluminum fins and copper tubing. Only use cleaners specifically designed for HVAC coils.
Forgetting to clear the area around the unit is a missed opportunity. Even if you clean the coils perfectly, a unit surrounded by overgrown shrubs or stored equipment will accumulate debris again quickly and run less efficiently due to restricted airflow.
When to Skip DIY and Call a Professional
There are a few situations where I always recommend picking up the phone rather than picking up the garden hose.
If your indoor evaporator coils need cleaning, that's a professional job for the reasons I described earlier. The access requirements, refrigerant proximity, and warranty implications make it too risky for most homeowners.
If you notice refrigerant leaking (usually visible as oily residue on or near the coils), don't touch anything. Refrigerant handling requires specialized certification and equipment. Turn the system off and call a licensed HVAC technician.
If the coils are severely corroded, a basic cleaning won't solve the underlying problem. Corrosion typically means the coils are nearing end of life and may need replacement. A technician can assess the damage and advise you on whether a repair or replacement makes more sense for your situation.
If your system isn't performing well even after you've cleaned the outdoor coils, the issue may be deeper than surface dirt. Low refrigerant charge, a failing compressor, or ductwork problems can all mimic the symptoms of dirty coils. A professional diagnostic can pinpoint the actual cause and get you back to full comfort.
Keep Your Heat Pump Running at Its Best
Cleaning your heat pump coils isn't glamorous work, but it's one of the highest-impact maintenance tasks you can do as a homeowner. A clean outdoor unit runs more efficiently, costs less to operate, and lasts longer than one that's been neglected. Paired with regular filter changes and professional maintenance twice a year, you'll get the most out of your heat pump investment regardless of what Alberta's weather throws your way.
If you're not comfortable tackling the job yourself, or if it's been more than a year since your last professional tune-up, give us a call at 587-834-3668. Our team at FlameTech Plumbing & Heating services heat pumps across Calgary, Airdrie, Cochrane, Okotoks, and the surrounding areas, and we're always happy to help keep your system running at its best.